- HBN-scrollwrork.jpg (41.69 KiB) Viewed 43820 times
I then proceeded to water gild the robbon in Rouge Gold. Water gilding over embossed varnish is much like gilding over glue chipping as it takes a couple water gilds, then needs to be finished with a surface gild. It's difficult to get the gold to fully go down into the embossed design. After water gilding, I surface gilded it with pulverized red verigated copper leaf. The red copper leaf ends up showing through in the embossed design adding a touch of contrast with the Rouge Gold background. A very fine bright line was left around the ribbon. The pictorial frame was then water gilded in 23K gold over the airbrushed varnish. When backing up, a bright line was left o the interior side of the frame. The end effect is a mirrored gold outline with a simulated bevel created from the airbrushed tinted varnish.
Step 4 - Gilding Sandcarved Ornaments
- HBN-ornamentTinting.jpg (52.83 KiB) Viewed 43820 times
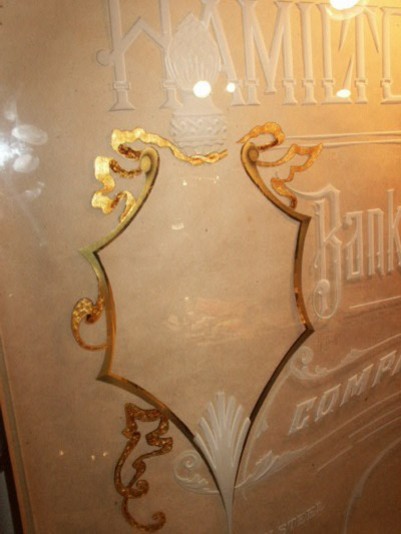
Firstly, I sealed the sandcarved ornaments with 2 coats of Frog Juice (an optically clear synthetic overcoat). This will enable me to water gild over the sandcarving. Next, I opted to try a new technique and airbrush a transparent glaze into the sandcarved areas to create a shaddow effect. I used transparent gold screen ink and a dot of black Fibroseal in Frog Juice for the glaze. I hacked up some pieces of vinyl and pieced together some masking over the ajoining sandcarved areas that I didn't want the glaze to go into. (It was alright for the glaze to be on the smooth glass because it can easily be scraped off.) This is the glaze as viewed from the front of the glass.
- HBN-ornamentsGilded.jpg (78.74 KiB) Viewed 43820 times
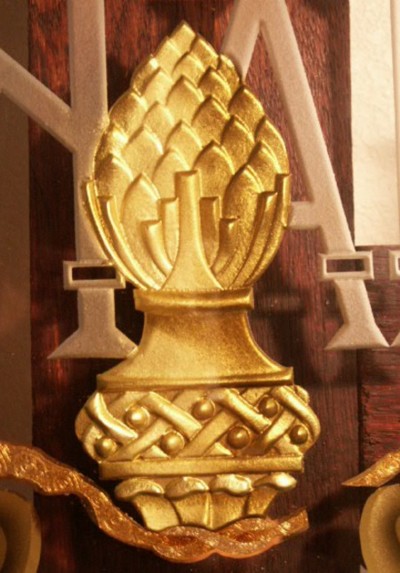
I then water gilded the ornaments with 23K gold. Like most "non-flat" gilds, it took 2 water gilds, then a surface gild. It was then backed up with Fine Gold ochre backing paint.
- HBN-ornament3Finished.jpg (71.83 KiB) Viewed 43820 times
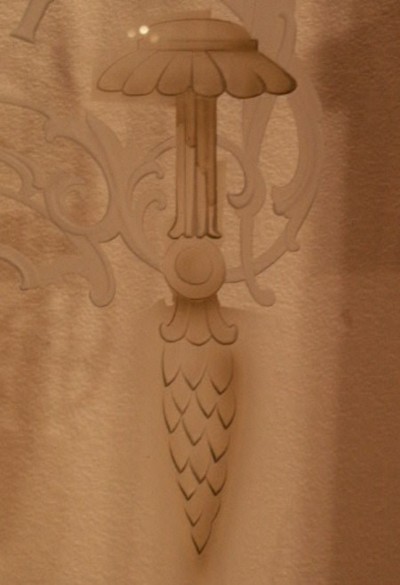
Here is the R/H ornament after gilding. You can see how the airbrush shading has added an additional effect to the element.
- HBN-ornament1Finished.jpg (83.03 KiB) Viewed 43820 times
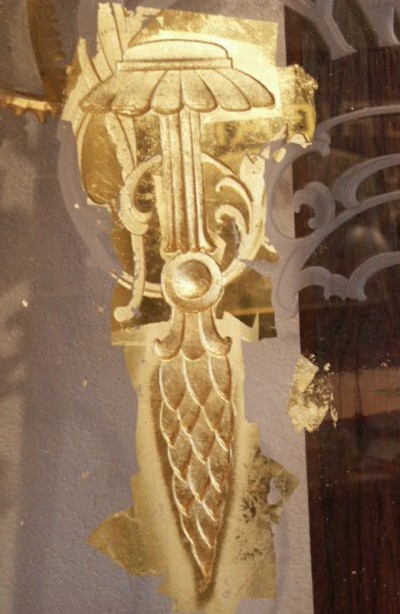
Here's the upper ornament, as viewed from the front of the glass, after the excess gold has been removed. A small piece of razor blade is used to scrape off the excess gold and backing paint. It scrapes off clean at the edge of the sandcarving.
- HBN-ornament2Finished.jpg (65.99 KiB) Viewed 43820 times
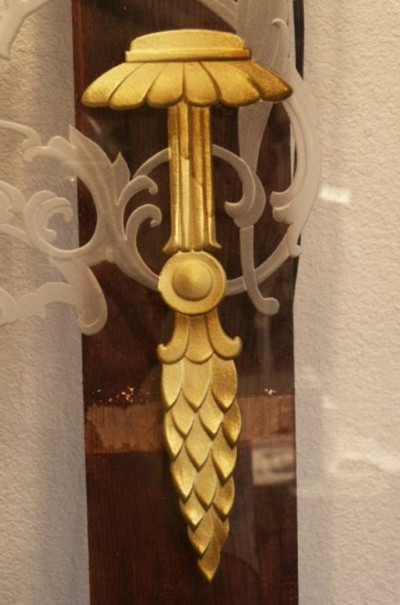
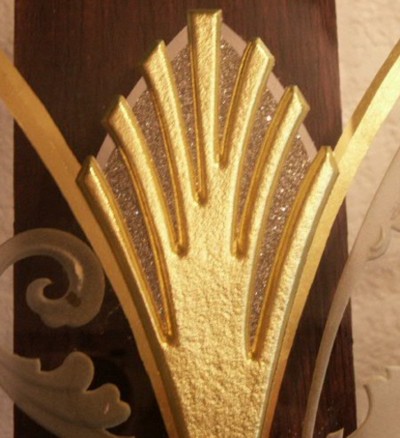
This is the ornament at the bottom of the pictorial frame. After gilding and cleaning, I water gilded a stripe of paladium leaf, then filled the centers with silver glass glitter.

- HBN-ornamentsOverall.jpg (79.04 KiB) Viewed 43820 times
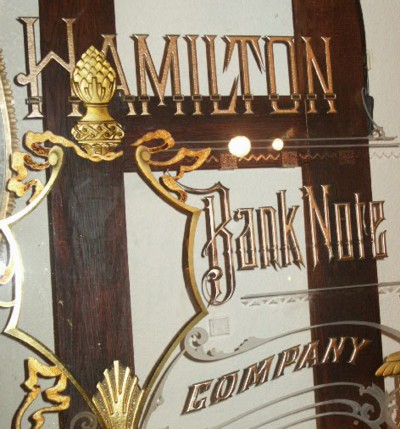
And here's the overall view. Now it's on to gilding the main copy. The sandcarved elements are sealed one at a time, then gilded. This way if any stray gold gets into an unwanted area of the sandcarving, it can be easily removed. As I look at this piece as it comes along, I will be deviating from some of my initial finishing ideas.
Step 5 - Rendering Main Copy

- HBN-Step5-1.JPG (62.23 KiB) Viewed 43820 times
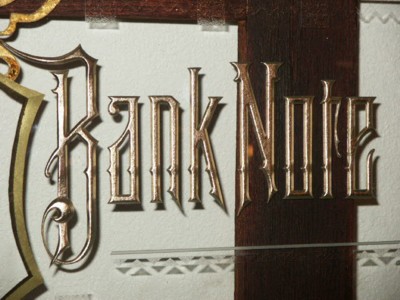
On this next step of rendering the main copy, I again sealed the sandcarved characters with 2 coats of Frog Juice. After the Frog Juice was dry, I water gilded it twice with 22K Moon Gold. After the second gild, I could still see a few cracks, so I did a surface gild over it, and to be on the safe side, I backed it up with metalic One-Shot mixed to match the gold color. After the One-Shot was dry, I backed that up with Fine Gold back-up.
- HBN-Step5-2.JPG (59.31 KiB) Viewed 43820 times
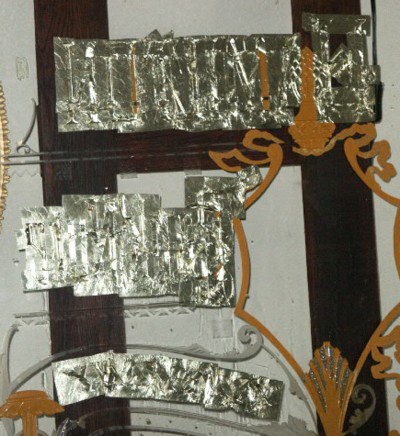
After all that was dry, I cleaned off the excess gold, and, using a razor blade, scraped off the remaining gold to the sandcarved edge.
- HBN-Step5-3.JPG (36.54 KiB) Viewed 43820 times
Here's a close-up. (The shade on the letter is just cast against the wall behind the piece.)
- HBN-Step5-4.JPG (62.29 KiB) Viewed 43820 times
As seen in the original lithograph, the main copy has split shade on it. The first shade also contains an outline around the rest of the letter. This first shade and outline has been water gilded with 16K pale gold. (The second shade will be water gilded in Paladium leaf.)
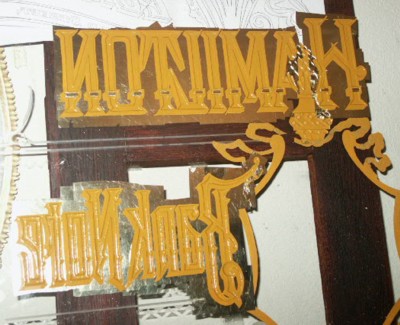
- HBN-Step5-5.JPG (44.15 KiB) Viewed 43820 times
The 16K gild is backed up with Fine Gold Ochre back-up. Two different size quills were used, one to paint the outline, and another to paint the wider drop shade.
This step-by-step is continued in Hamilton Bank Note reverse glass sign, Step-by-Step Part 3
 Denver Chapter of the Letterheads