This was a trace of a window made in 1905 for a hotel window which recently was smashed. When Pouring into the centre like this usually gives a definate pour mark ,but because the liquid was moving nice and steady I only had a slight pour mark in the centre . My aim was to cover the pour mark centre within the design using a toned acid 1-3 for 45 minutes which worked great. I think next time I would angle the glass and pour it from the top like a curtain flowing down. I like the finish it gives to the surface ,seems far better than sandblasting.
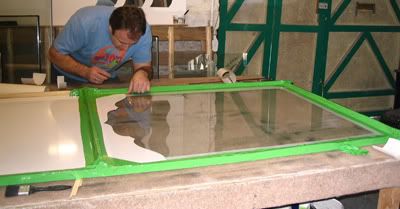
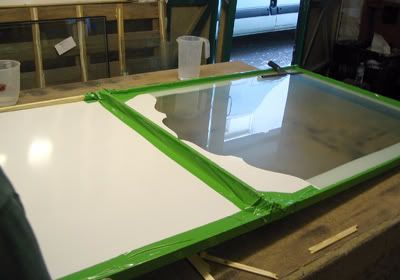
I start with Building a dam in wood strips covered in any type of vinyl, years ago they would have used tallow.
For smaller pieces I use a tray made from polypropolean which I had made. The dam you see will cotain the acid.
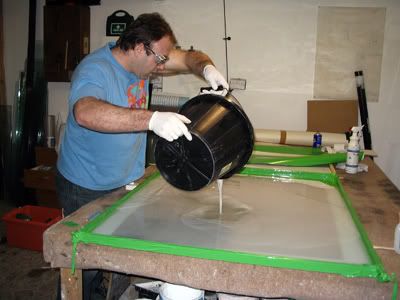
Pouring the acid central to roughly where the design will be.
The acid is now left on for one and half hours.
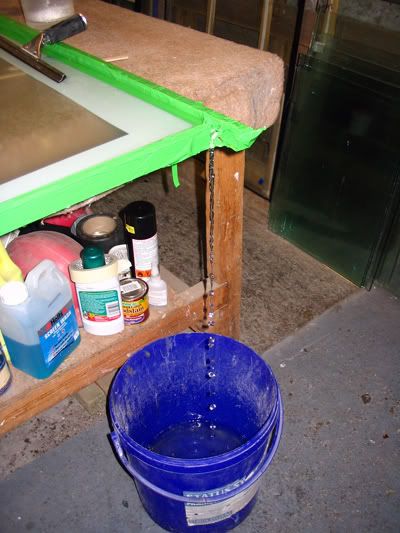
Now its ready I make a gap in the vinyl wall tilt the glass slightly and let the acid fall into the bucket ready for next time.
You can keep using this over and over but always make a test to see if it's working correctly.
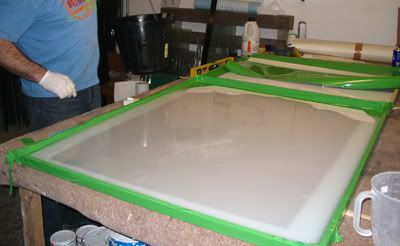
Now I pour over some water and let it dissolve the layer of white scum on top of the glass.
The toned acid finish is under the scum which needs an hour or so to disolve.
Once this was dissolved I cleaned the glass and covered the whole piece in a white vinyl without joins( no overlaps) ready for my design
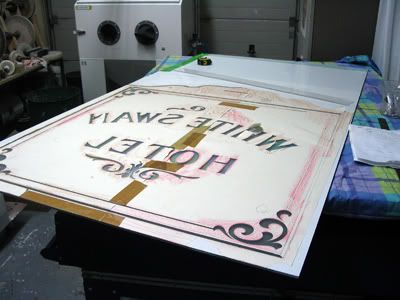
The original design was traced by the glass company . I then stuck this to the vinyl resist ready to hand cut.
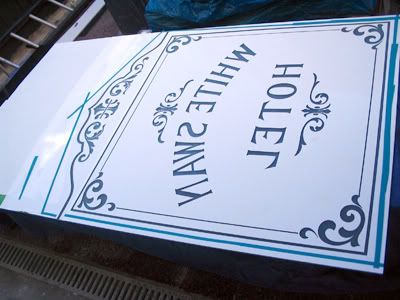
This is the glass now leveled and containing the acid within the letters and scrolls . The 1-3 acid to water concentration was left on for 45 minutes
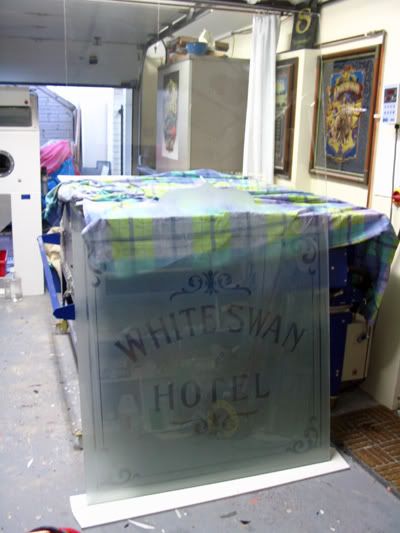
Not the most exciting of pieces but it shows a brief discription of this old process.
Just let me add here that acid is very dangerous and it does require respect so where goggles and gloves and a proper mask , also try to work with plenty of ventilation.
I usually make my pieces out side which helps. You can buy gell creams from the same company that you buy your acid from to help if you have an accident to your skin . Take your time!
I will post some more acid work next week which contains 4 tones and brilliant cutting along with some gold staining fired in the kiln.
A question for Pat and anyone else involved in this type of work . Would you say it's better to pour from the top and let it flow down over the glass or even have two people pouring to stop wave marks in the final finish?
I hope this short step by step will have helped some people and given them an insight to acid toning.
I am still learning as we all are, so any other ideas are very welcome.
Maybe even some old pictures of this process that people you know may have.
Thanks
Dave
Dave
 Denver Chapter of the Letterheads